 There are many ways to build a fence. The following steps are just one method, and each of the steps can be modified to suit your particular situation.
Step 1 – Planning the Fence
Once you have decided what type of fence you are going to build, you need to work out what types and quantities of materials you are going to use.
- First measure up the length of fence to be built, and work out where you want to place gates, if any. Single gates are commonly used for human access, double gates for vehicle access.
- Determine what spacing you are going to use for support posts. This will depend on how strong you want the fence to be – taller and/or heavier fences usually require shorter spacing between support posts. Common spacing distances are 2.1, 2.4 or 2.7 metres from the centre of one post to the next. The less uprights you use, generally the cheaper the fence, but this needs to be balanced against the strength of the fence.
- Draw a simple plan (side view of the fence) to scale, showing length and height dimensions and the location of gates. Take your plan to your local timber merchant/hardware store. Ask them for advice on the best types of timber to use in your area, and the quantities required for your fence. Don’t forget to consider all the ‘extras’ you will need such as nails, screws, bolts, hinges and other fittings for gates, bags of pre-mixed concrete (either standard or rapid set), etc.
You will also need to determine what tools and safety equipment (boots, gloves, hearing and eye protection, sun protection, etc.) you will need. For instance, you will most certainly need a spirit level to ensure you set your posts perfectly vertical and your rails are perfectly horizontal.
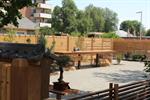
Step 2 – Getting Started
Before you can build your fence you need to have a clear working area. This may require the removal of an old fence, pruning back or removing plants, and lifting old paving or concrete. Make sure you have plenty of room to move comfortably and safely. Dispose of any rubbish/debris and level out uneven surfaces (as much as possible) prior to beginning fence building. Timber can be pre-treated with a preservative or paint, in particular the base of pickets and palings, the parts of posts to be placed in the ground, and end grains of rails.
Note: Before digging any holes for posts you will need to check the location of any services in the immediate area (including phone, gas, water, sewerage, and so forth). Contact your local council or service providers for advice. It can be very costly, inconvenient, as well as dangerous, to accidently damage one of these services.
Step 3 – Setting out the Posts/Uprights
- The simplest way to get a straight line for your fence is to stretch out a builder’s stringline (available from hardware stores) firmly secured at each end to keep the line taut.
- Using a tape measure and small wooden pegs, locate the position of the posts (at the pre-determined spacing) along the stringline - making sure you start with gate posts (the gap between gate posts needs to be as accurate as possible, and allow for about 10mm extra on each side to provide clearance for the gate to open and close, plus an additional 10-15mm between gates if double gates are used).
- Once the post positions have been marked with the wooden pegs, start digging the post holes, using the position of each wooden peg as the centre marker for the hole. Holes for gate posts should ideally be 400 x 400mm wide x 600mm deep. Holes for other fence posts should ideally be 300 x 300mm wide x 600mm deep. Any bigger will require you to use excess amounts of concrete.
-
Step 4 – Attaching the Rails
- Mark the position of where the rails are to be fixed to the post. For a paling fence the bottom rail should be a maximum of 175mm from the plinth, the top rail 75mm from the top of the post and the centre rail is half way between the two.
- The notches for the rails are made by sawing to the depth of the rail and chiselling out the excess, so that the rail is flush with the post.
- Nail the rails to the posts, making sure that the joins are butted together in the middle of the post.
- Nail the plinth (base board) at the bottom of the posts, using a stringline to make sure the plinth is straight.
Step 5 – Fixing the Palings/Pickets
- For 67mm pickets, mark the spacing on to the top and bottom rails at 90 mm intervals (i.e. 23mm gap and 67mm picket width). Nail the pickets onto the rails, using 2 nails per picket on each rail.
- For paling fences, the palings can be butted together, or they can be overlapped. For overlapped palings, nail 150mm palings onto the rail, leaving a 50mm space between each paling. Then nail 100mm palings over the gaps so that they overlap 25mm on either side.
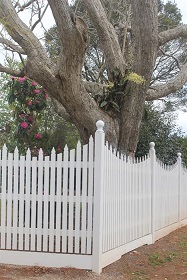
Step 6a – Trimming/Capping the Palings
- The tops of the palings and the posts are sawn off in a straight line 200mm above the upper rail.
- Alternatively, capping can be fixed to the top of the fence to protect the timber. If using capping, the top rails and palings must be flush with the posts.
 Step 6b – Fixing Capitols to Picket Fences
- Cut the posts to the desired height.
- Spread silicone on top of the post before nailing the capitols on. Using 3 nails per capitol, skew nail the capitols to the post (this makes it harder for them to be pulled off).
- Cover the nail holes with putty and sand off when dry.