Explore Your Creativity With Carpentry
Do you enjoy working with your hands? Experiment with woodwork, selecting different types of timber, planning projects, and creating your own project.
Work with our specialist academics to ask questions, develop your creativity, and build practical skills. Along the way we shall review different types of joints and ways of cutting timber and both indoor and outdoor construction techniques. The course will enlighten both amateurs and professionals alike.

Course Duration: 100 hours
Course Structure
This course has ten lessons.
- Scope and Nature of Carpentry
- Scope and Nature of Carpentry
- Understanding Wood
- Resistance to Rot, Fire
- Defects in Timber
- Turning Trees into Timber
- Ways of Cutting Logs
- Shrinkage Effects
- Seasoning Timber
- Moisture content of Wood
- Stress Grading
- Types of Wood
- Types of Composites
- Buying Timber
- Carpentry Tools, Equipment, Materials and Safety
- Carpentry Tools, Equipment, Materials and Safety
- Hand Tools: saws, hammers, chisels drills, planes,screwdrivers, other tools
- Power Tools: nail guns, saws, electric drills, planer, sander, router
- Materials: sandpaper, steel wool, nails, wood screws, glues, wood filler
- Safety
- Tool Maintenance
- Sharpening techniques
- Sharpening tools: planes, chisels, saws
- Cutting and Joining Timber
- Storage: tool boxes
- Hiring tools
- Cutting and Joining Timber
- Cutting and Joining Timber
- Types of joints: edge, butt,angled, mitres, framing, dovetail, mortise and tenon, housing joints, halving joints, etc.
- Nails
- Screws
- Staples, bolts, connectors, straps, corrugated fasteners, glues
- Glue blocks, dowels,biscuts, splines
- Cutting and shaping timber
- Small Carpentry Projects
- Hanging tools on a wall
- The work bench
- Making a work bench
- Making a simple 2 door cupboard
- Making a coffee table
- Making a bookcase
- Outside Construction
- Choosing timber
- Pests: termites
- Timber preservatives
- Keeping timber off the ground
- Using timber in the garden
- Recycled timbers
- Outdoor furniture
- Building a wood deck
- Building a wood fence
- Where to build in the garden
- Constructing a wall with railway sleepers
- Constructing Small Buildings
- Types of foundations
- Framing
- Roofing
- Building a wooden cabin
- Building a wood gazebo
- Building a cubby house
- Understanding House Construction
- Timber framed buildings
- Timber floors
- Doors and door frames
- Door Construction
- Door frames
- Architraves and skirting
- Windows and frames-sash, sliding sash, casement, pivot, slat
- Roofs: single, double, trussed, etc.
- Handyman Repair Work
- Fitting a lock
- Repairing a sash window
- Fitting and hanging doors
- Hanging a cupboard door
- Form work for concrete foundations
- Relaying floorboards
- Resurfacing timber floors
- Repairing a broken ledge and brace gate
- Finishing Wood
- Creating smooth surfaces -using a plane, sanding, etc.
- Paints, stains and varnishes
- Polyurethane
- Shellac
- French polishing
- Stains
- Paints: defects in painted surfaces, repainting
- Veneering
- Preparing outdoor surfaces
- Tips for outdoor finishes
- Planning and Setting Out a Project
- Setting out
- Making a setting out rod
- Introduction to technical or trade drawing
- Drawing instruments
- Types of drawings: plans, sections, elevations, etc
- Setting out a technical drawing
- Building regulations
- Measuring up
- Working out quantities
- Preparing and surveying a site for construction
Enrol Today
Ready to get started? Click on the orange enrol now button.
Have questions? Click here to email our course counsellors.
Making a Simple 2-Door Cupboard
For this project we are going to look at making a simple two door free-standing cupboard using plywood or MDF for the panels, shelves, and doors, and softwood or hardwood timber for the edging, face frame, and beading. We shall include two inside shelves though you could adjust this to suit your needs. The shelves will be set on pins which can be moved up or down using drilled holes to adjust the height of the shelves. The doors will be of plywood and you can add beading to the front for decoration (though you could make framed doors with an inside panel if you prefer so that the timber matches the front frame and edges).
What you need for the carcass and dimensions:
- Side panels x 2 (35¼ x 16 x ¾) (895mm x 406mm x 19mm)
- Back panel x 1 (33 x 31¼ x ¼) (838mm x 794 x 6.35mm)
- Top panel x 1 (32 x 17½ x ¾) (813mm x 445mm x 19mm)
- Bottom panel x 1 (30½ x 15¾ x ¾) (775mm x 400mm x 19mm)
- Shelves x 2 (30⅜ x 15½ x ¾) (771.5mm x 394mm x 19mm)
- Side edging x 2 (18¼ x 1½ x ¾) (464mm x 38mm x 19mm)
- Front edging x 1 (33½ x 1½ x ¾) (851mm x 38mm x 19mm)
- Face frame top rail x 1 (29 x 2 x ¾) (736.6mm x 50mm x 19mm)
- Cleats x 2 (30½ x 4 x ¾) (775mm x 100mm x 19mm)
- Face frame bottom rail x 1 (29 x 1½ x ¾) (736.6mm x 38mm x 19mm)
- Face frame side rails x 2 (35¼ x 1½ x ¾) (895mmx 38mm x 19mm)
For the doors:
- Doors x 2 (32¾ x 14⅞ x ¾) (832mm x 378mm x 19mm)
- Beading x 8
Step 1 - Cut the Boards
The first thing to do is to cut the plywood to size for the various parts (top, bottom, sides, shelves, doors and cleats; which will support the top). You then need to cut a rebate groove into the inside edges of the two side panels using a router with a ⅜ (.3750mm) inch rabbet bit. This way, the back panel will slot into the side panels. You could, alternatively, attach the back panel directly to the end panels in which case you'll need to make it slightly wider.
Step 2 - Drill Holes for Shelf Pins
Drill holes on the inside of the two end pieces so that they match up. You'll need two columns on each end piece so that the inside shelves are supported on four corners by moveable shelf pins. You could use a drill guide attached to a drill to do this, or line both ends next to each other on the bench top and mark out the rows using a square and straight edge.
Step 3 - Secure the Bottom
Drill and screw the bottom panel to the sides so that it is around three inches from ground level. Pre-drill countersunk holes on an angle through the ends of the base into the sides from underneath to do this.
Step 4 - Complete the Carcass
Position the two cleats towards front and rear of the top of the two sides and screw flush to the tops of the sides using a couple of screws at each end (each cleat being 100mm (four inches) wide). Position and secure the back panel using nails.
Glue and nail the face frame rails onto the carcass. The top of the bottom rail will be flush with the bottom panel and the bottom of it will be above ground level (the bottom of the face frame side rails forming short legs). The top and bottom face rails sit inside the side rails. The side frame rails will be rebated on the inside upright edge to fit into the side panels. Once again, you could sit the rails onto the end panels if you are unable to cut out the rebates.
Attach the wooden edging to the front and sides of the top panel and secure it on top of the carcass screwing into the cleats from underneath.
Step 5 - Hang the Doors
Cut beading for the front of the doors. To do this, you can cut the ends using a mitre block so that you have four pieces of beading on each door face forming a rectangular shape equidistant from the edge of each door.
Attach two self-closing type hinges to the doors spaced one near the top and one near the bottom so that they line up. Screw the doors to the face frame using the hinges so that there is a slight gap between the doors (approximately 0.125mm (⅛ inch)).
You could glue on veneer to the front of the two shelves in keeping with your frame.
Carpentry Skills for Landscaping
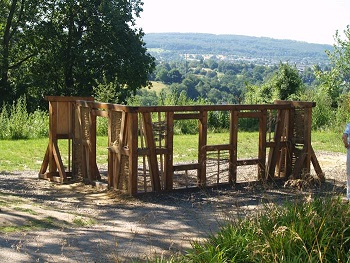
Wood is a significant building material for landscaping. It is often used to construct fences, garden furniture, buildings (eg. sheds, gazebos); pergolas, and playground equipment. It is sometimes used for other construction as well: from retaining walls to paving.Landscapers who can work with wood will not only be able to build things; but through a better understanding of timber construction, they will be better garden designers.
How Can This Course Help Me?
This course is designed to be of benefit to people who are interested in learning how to work with timber whether professionally or for personal benefit. It will also be of value to those who use carpentry in day-to-day work or business roles.
Take this course if you would like to:
- Find ways to improve an existing business which involves carpentry
- Enhance your employability in carpentry-related businesses
- Improve your knowledge of woodwork techniques
- Develop skills for freelance carpentry or handyman work
