
LEARN COOKING ONLINE
- Food Preparation -e learning, home study course
- Start any time, study anywhere at your own pace
- Experienced and professionally qualified tutors
Learn to prepare and cook delicious healthy and nutritious food in this introductory course.
- Gain new skills in introductory food handling, cooking and hygiene
- Gain skills necessary for catering business
- Stand alone course or can be taken with Event Management; Food & Beverage Handling; Bed and Breakfast or Starting a Small Business
The Lessons
There are 9 lessons in this course:
- Introduction
- History of cooking/ Trends
- Principles of Cooking
- Nutrition
- Scope of the Catering industry
- Weights and measures
- Basic cooking techniques
- Terms
- Fruit and vegetables
- Why eat Fruit & Veg; How much a person should eat; How poor preparation can damage nutritional value
- How to choose fruit and vegetables when shopping
- Basics of preparation- peeling slicing etc
- Cooking techniques
- Nutritional information relating to food group
- Cereals & Starches; Bread, cereals and potatoes
- Preparation- including how to make fresh pasta
- Why eat cereals & starch; How much a person should eat; How poor preparation can damage nutritional value
- How to prepare potatoes- different types of potato dishes- mashed, boiled, daulphinoise etc
- Cooking pasta- different recipes
- Cooking Rice, cous cous etc.
- Nutritional information relating to food group
- Meat Fish and Alternatives
- How much a person should eat
- How poor preparation can damage nutritional value
- Selecting the perfect cut of meat/ basic butchery, fish mongery
- How to prepare and cook it, which sauces compliment it.
- Eggs- cooking different types
- Cooking with pulses
- Nutritional information relating to food group
- Milk and dairy
- How much a person should eat
- How poor preparation can damage nutritional value
- Cheese making basics
- Cheese types and recipes
- Basic recipes e.g. Macaroni cheese
- Dairy free cooking
- Yogurt
- How to make it, use in sauces
- Dairy free cooking
- Nutritional information relating to food group
- Fats and Sugars
- How much a person should eat
- How poor preparation can damage nutritional value
- How to make perfect puddings
- Types of fat
- How to adapt recipes to reduce sugar and fat- catering for low fat and low sugar dietary requirements
- Nutritional information relating to food group
- Flavouring Food
- More on complimenting foods- sauces- cream, wine, butter, vinaigrette etc
- Stocks
- Use of herbs/ seasoning
- Menu planning on a Small Scale
- Designing menus- complimenting foods
- Recipes simple to advanced- Seasonal foods
- Planning a dinner party- case study
- Menu Planning on a Large Scale
- Planning Meals/Catering for parties and events; outdoor, indoor etc
- Restaurant Menus/Catering
Each lesson culminates in an assignment which is submitted to the school, marked by the school's tutors and returned to you with any relevant suggestions, comments, and if necessary, extra reading.
BACKGROUND -
The origins of cooking
 Cooking is defined as the process of preparing food for eating by applying heat. Scientists have found it difficult to determine when exactly human beings started cooking and in general believe that the controlled use of fire by humans for the purpose of cooking food existed somewhere between 125,000 and 250,000 years ago.
Today’s cooking results of the evolution of agriculture, commerce and greater transport links between countries which has allowed us to access new ingredients and learn different cooking techniques and recipes. We have also benefited from new inventions and technologies from the first pottery pots used for boiling water to the invention of the microwave and beyond.
Cultural aspects of Cooking
Most cultures have developed different cooking traditions and practices which are influenced by factors such as climate, which affects the foods available to the cook, economic conditions and religious traditions. Today when visiting large towns and cities we are able to choose between a wide variety of different cuisines e.g. French, Italian, Chinese and Indian. We shall examine each of these types of cuisine in later lessons. However, it is also notable that in the past 100 years traditional food choice and eating habits have also changed dramatically. As a society we are eating away from home much more than ever before. When at home we are also eating more pre-packaged meals or take-outs
Ingredients used in cooking and Nutrition
In the main, ingredients used in cooking are derived from living things. This includes meat, eggs, and dairy products derived from animals and vegetables, fruits, grains and nuts come from plants and mushrooms and the yeast derived from fungi. In the process of cooking we also utilise water and minerals such as salt.
Going back in time the food we originally consumed was obtained by hunting and gathering and then over time to basic farming ad fishing processes. While today’s farming processes are more complicated utilising intensive farming and industrial processes.
The food we eat is composed of nutrients - proteins, carbohydrates and fats in addition to water and minerals. Cooking involves a manipulation of the chemical properties of these molecules. We shall now look at these nutrients in more detail but please note that nutritional information is covered in greater depth in other courses.
Protein
Protein serves a number of essential functions in the human body. It is needed to build and repair muscles, to make hair and skin, fight against infections and to carry oxygen in our blood. Proteins are made up of building blocks called amino acids. There are twenty different amino acids, and while our body can make some of them, there are eight amino acids that our body can't make.
These are called essential amino acids and the only way we can get them is through the food we eat. It is important to eat a variety of protein foods every day to make sure your body gets all of the essential amino acids. Protein itself is derived from edible animal material such as from muscle, offal (internal organs), milk and eggs.
These animal sources are all good sources of protein that have all eight essential amino acids. Protein is also found in smaller amounts in plant foods such as legumes (beans and peas) and in nuts and seeds. These plant sources can lack some of the essential amino acids and it is therefore important for vegetarians to eat a good variety of plant foods to ensure they get all the amino acids the body needs. Cooking denatures protein which means that it changes the structure of protein. In doing so the taste and acceptability of the product is increased e.g. a cooked egg tastes better than a raw egg and is more appealing.
Carbohydrates
Carbohydrates provide our bodies with the most efficient source of energy. Carbohydrates come in two forms - starches (also named complex carbohydrates) and sugars (simple sugars). Starches are found in foods such bread, rice, pasta, cereals and potatoes, while sugars are found in fruit and vegetables and also in foods such as sweets, soft drinks and cakes. Carbohydrates are an essential part of a healthy diet and should make up 50% of our daily calorie intake. When planning meals we must therefore ensure adequate intakes. The majority should come from complex carbohydrates, preferably the wholemeal varieties, as well as a large intake of fruit and vegetables.
Fats
Fats are found in most foods, it is either present in foods from the beginning (such as in meat and cheese), or it's been added in cooking. Fat supplies essential nutrients such as fat-soluble vitamins and essential fatty acids (EFAs) which are thought to have a positive effect on heart health and the immune system. Fat can itself be divided into two main groups - saturated and unsaturated. Saturated fat is generally solid at room temperature and can usually only be found in animal sources such as in butter, hard margarine, cheese, whole milk and anything that contains these ingredients like cakes, biscuits, chocolate and pastries Fat is an essential component of good cooking helping the ingredients in food, come together for texture, and flavour.
Food preparation- the basics
 By following this course we hope you will develop a love of cooking and at this stage you are probably eager to get started on learning some recipes and cooking techniques. However, whether you are cooking at home for friends and family or are intending to use your newly acquired skills in the catering industry, it is important to appreciate the steps involved in basic food preparation as ignoring these can be costly later. In fact to fully appreciate this you could spend some time watching a professional chef, the best chefs will ensure that all essential ingredients are sourced and prepared well in advance allowing all meals to be cooked quickly to order.
Here are some basic steps to consider- additional tips for different types of food will be given throughout the course.
Step 1 - Source your ingredient in advance, Whether you intend following a recipe or are preparing a dish you know off by heart, the first thing you need to do is make sure you have all the necessary ingredients. There's no point starting to cook and then finding out that a vital ingredient is missing. To avoid this happening take all the ingredients out of the cupboard and line them up on your work surface (i.e. all ingredients that do not need to stay in the refrigerator until cooking).
Step 2 - Wash your hands- Your hands can easily spread bacteria around the kitchen and onto food. This is why it's important to always wash your hands thoroughly with soap both before cooking and after handling raw ingredients such as meat and poultry.
Step 3 - Keep your worktops and cooking materials clean- Before you start preparing food, it’s important to make sure that your worktops, kitchen utensils and chopping boards are clean. Also don't forget to change dish cloths and tea towels regularly as these can also harbor bacteria.
Step 4 - Separate raw meat/fish from dry/ ready prepared ingredients-more details on food safety and raw meats / poultry are given in lesson 3 but at this point remember that it is especially important to keep raw meat and fish away from foods ready for consumption such as salad, fruit and bread. These foods won't be cooked before you eat them any bacteria that come into contact them will not be killed in the cooking process.
Step 5 - Where relevant wash, peel, chop and grate ingredients before you start cooking.
Step 6 - Clean up/ clear up as you go along so that you keep work surfaces clean and manageable
Cooking Terminology
As you start following recipes you are likely to discover some cookery terms that are unfamiliar. A few basic food preparation and cooking terms are shown below and others will be provided in different lessons of the course. Try to ensure you are familiar with each of the preparation/ cooking techniques used in a recipe before you start out.
Preparation terms:
Cutting
Cutting refers to breaking foods up into smaller pieces which are usually in a uniform shape. There are different cutting techniques which are considered in other lessons e.g. slicing, dicing and shredding. In contrast chopping is a term used to refer to cutting foods into pieces such as cubes when chopping foods we generally make a larger cut and the chopped food does not have to be uniform.
Whisking
Whisking refers to the process of beating an ingredient repeatedly and vigorously to allow air to be incorporated so that the food becomes frothy. Common foods that are whisks include eggs and cream.
Kneading
Is a term used in bread and cake making. Kneading involves mixing stiff dough by repeatedly compressing it and folding it in or over. Kneading allows the development of sheets of gluten in the mixture and to incorporate air.
Cooking methods
Today we use a vast array of different cooking techniques including baking, roasting, stewing, frying, grilling, smoking, boiling and steaming. Many of these techniques can be traced back thousands of years to more recent methods such as micro-waving. We shall examine some of these methods in this lesson. Throughout the course you will also have opportunities to try out different cooking techniques and will see that the chosen method of cooking greatly affects the end result with some foods being more appropriate to some cooking methods than others.
Roasting
Roasting is defined to cook food in an uncovered pan. This is a cooking method that utilises dry heat which can be from an open flame, oven, or other heat source. In the roasting process food may be placed on a rack, in a roasting pan or rotated e.g. on a rotisserie. As foods are roasted they are exposed to high heat which produces a well-browned surface and seals in the juices. Roasting is a good cooking method for large, tender cuts of meat and can also be used to cook poultry and fish. Additionally, you can roast vegetables and this works particularly well if you are roasting alongside especially if you roast them alongside meat. You can also roast firm fruits, like apples, pears and tomatoes. This is usually referred to as baking instead of roasting but essentially there is no difference in the process involved
Frying
Frying involves cooking food in fat over a heat source. It is believed that this method of cooking has originated in ancient Egypt around 2500 BC. There are different methods of frying deep frying food e.g. in deep frying food is submerged in hot, liquid fat, while in frying (also called pan frying ) or sautéing food , food is cooked in less fat which des not completely cover the food. You can fry a wide variety of foods including vegetables, eggs (e.g. in the form of a fried egg, omelette or pancake), fish, meat and poultry.
Equipment required: heat source, fat or oil and a suitable pan e.g. a Shallow Frying Pan - for eggs, fish, meat etc, a Sauté Pan or deep pan with a lid for frying chicken etc.
Grilling
Grilling involves the application of heat to the surface of food, commonly from above or below the food source.
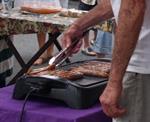
Grilled foods can be cooked in a number of different ways including over a heat source e.g. on a barbeque or gas/ electric grill, under a heat source e.g. under a gas or electric grill or between heat e.g. between electrically heated grill bars. You can grill a wide variety of foods including Fish, meat and vegetables, e.g. mushrooms and tomatoes.
There are several advantages to grilling foods e.g. food can be cooked quickly, foods are given a distinctive appearance and flavor, grilling meats is also far healthier than other methods which are used to cook meats as this method allows some visible fats to drain from the meat. As a disadvantage, grilling can dry out foods and is not suitable for older tougher cuts of meat.
Equipment required: A grill and tongs/ spatulas, are necessary for getting foods on and off the hot grill rack and for turning over foods.
Steaming
Involves cooking in the steam resulting from boiling water. The water itself never comes into contact with the food. Steaming can be done by pouring a small amount of water in a saucepan and keeping it on the boil so that the resulting steam can cook the food or alternatively it is possible to purchase a specifically designed steamer both techniques require you to ensure that the cooking water does not run dry. Steaming is a healthy method of cooking as it requires no fat to be added and also helps to preserve the vitamins and minerals in food against boiling where these nutrients can be leached out of the food and lost into the boiling water.
Equipment required: Heat source, large cooking pot, water and a steaming rack, colander, or steamer
Boiling
Boiling is defined as cooking in a liquid that has reached its highest possible temperature of 212°F (100oC). Most foods can be boiled including pasta, potatoes, rice, vegetables and seafood. Boiling food has a number of advantages e.g. it is an easy method of cooking which lends itself to large scale cookery. It is also an effective method of cooking older, tougher cuts of meat and poultry making them more digestible. Despite these advantages, there are also some disadvantages. One main disadvantage is that water soluble vitamins are lost into the cooking water. This is a particular problem if vegetables are cooked in too much water and for too long. Some boiled foods can look unattractive e.g. some meats and boiling can also be a slow method of cooking food.
Equipment required:
- A suitable pan e.g. a ssaucepans/ stock pot
- Heat source
- Cooking liquid e.g. water, stock, milk, cream
Measuring quantities
Today most recipes expect you to measure out distinct quantities of solids or liquids using specific measuring utensils (scales or graduated jugs), however, when recipes were first developed required quantities were expressed in terms of what would be to hand, like 'teaspoons' 'tablespoons' and 'cups'.
The ‘cup’ is now little used in British recipes but continues to be used as a measure in American cook books.
Further confusion also results from the fact that a cup has a different volume in Britain than in America. It’s important to be aware of this where you are using an older British recipe where cups are used. In both countries a cup is equivalent to half a pint, however, there are 16 fluid ounces to a pint in the US and 20 in the UK.
For most recipes access to a measuring jug/ food scales in an essential part of the cooking process, although there continues to be differences in the way foods are measured. In the United States, for example, both dry and liquid ingredients are measured the same way using the same measuring device and the same units are used to measure volume. In the US other units of measure are used as well such as teaspoons, tablespoons, ounces, pints, and quarts. British (Imperial) units of measure are referred to in the same terms as in the U.S. system, such ounces and pounds. In the rest of the world the metric system is used where measurements are made in terms of litres (l) millilitres (ml), grams (g), kilograms (kg) and temperature is measured in degrees Celsius (oC).
In addition, some more everyday measures have also been redefined in terms of metric units e.g.
1 teaspoon (denoted as t. or tsp.) = 5 millilitres
1 dessertspoon = 2 teaspoons = 10 millilitres
1 tablespoon (tbsp.) = 3 teaspoons = 15 millilitres
In exception to this Australian recipes use a 15ml dessert spoon and a 20ml tablespoon.
Just to note that although the Metric system has been taught in UK schools since the 1970s and is now mandatory for the sale of food, a very large part of the population continues to use Imperial measures. To make it easier most modern cookery books give ingredients in both imperial and metric units.
Basic Cooking Equipment
As you gain knowledge and experience you are likely to wish to buy additional cooking utensils/ equipment but here is a list of some basic items which will help to get you started:
Saucepans and frying pans, it is a good idea to have a selection of these
- A large baking dish for lasagna etc.
- A casserole dish with lid
- Chopping boards- it is helpful to have at least two of these- one for bread ad vegetables and one for raw meat/ fish. It is also a good idea if you have different coloured chopping boards to save confusion
- A cheese grater
- A set of measuring spoons
- Rubber spatula
- Kitchen scissors
- Whisk
- Mixing spoons
- Tongs
- Peeler
- Mixing bowls in many sizes
- Colander
- A measuring jug and kitchen scales
 Becoming a confident cook – First steps
As highlighted earlier in this lesson, throughout this course we will discuss some basic food preparation techniques and highlight some simple recipes. As you go through each lesson it would also be helpful to develop your own scrapbook of recipes for each food group. Recipes may be found on line or from perusing recipe books/ magazine recipes etc. Remember also that practice makes perfect so spend time cooking different recipes and adapting them to make them unique.
Here are some additional points to remember when you start cooking:
1. Read the recipe/ instructions first? This can save you time and mistakes later- saving you from any surprises.
2. Note any unfamiliar cooking techniques and read up on them either from the course notes/ in a book/ online study
3. Ensure you understand each step in the recipe?
4. Ensure you understand how long the recipe will take to prepare and cook- giving yourself sufficient time will help you to avoid unnecessary stress.
5. Make sure you have made all the necessary preparations before starting the recipe e.g. does the recipe require you to have preheated an oven or pre-prepare any ingredients?
FROZEN FOOD
Whilst freezing is an excellent way of preserving many types of foods for very long periods of time, it is a relatively new development in the home. Before artificial refrigeration, food was commonly preserved by storing in an insulated, cold storage place. The temperature was not as low as freezing point, but was maintained much lower than the outside environment. A cool store, food cellar etc. are examples of this type of store. The principle they operated on was basically “By insulating food from the heat of the day, the advent of decomposition was prolonged and food was able to be stored for longer periods".
Although frozen food has been available since the 1930’s when first introduced by Clarence Birdseye they were expensive and unaffordable for most people. Frozen foods became more affordable in the period just after the Second World War when the quick freeze method had been fully developed as the best method of freezing food.
Not all your produce will need to be frozen so to extend your ability to keep food for lengthy periods and if you can find a place (or create a place) which is well insulated (such as an insulated room built under your house) you will have a reasonable cool store. A cool store should be kept dry and food stored there should be stacked in a way to ensure reasonable ventilation (eg. place a case of fruit on a wire rack, or at least on top of a couple of bricks). Apples can keep for months in a good cool store. Peaches, plums, apricots, etc. all keep far longer in a cool store than at normal room temperatures.
Freezing is the fastest and most economical way of preserving food it is also very easy as long as you follow a few guidelines for specific produce. You should endeavour to freeze food as quickly as possible so the best type of freezer for home food storage is the deep freeze, not the small frozen food type compartments as the temperature in these is not adequately cold enough to keep food for long periods of time. The equipment required for home freezing is very similar to that for preserving and bottling mentioned in the last lesson. The hard work will be taken out of the process if you also have access to an electric blender, food mills and shredder and choppers and an air extractor. However these are not essential. Freezer bags, tapes, suitable plastic containers, labels and a water proof are.
A few guidelines
- The freezer should be set to its coldest setting about 12 hours before adding new unfrozen produce. This helps to prevent formation of ice crystals on the food. The faster you freeze your food the better as it is helps to retain flavour and colour.
- Only freeze top quality fresh produce
- Some foods do not freeze well and these should be preserved by other methods:
bananas, cucumbers, celery, cabbage, lettuce and most greens other then spinach, potatoes, tomatoes unless they have been cooked and pureed
- Quick freeze produce as quickly as possible
- Handle produce as little as possible
- Keep food to be processed in the refrigerator
- Freeze in meal sized portions
- Package well to prevent freezer burn and try to eliminate as much air as possible from the freezer bags
- Label and date produce
- Put newly processed food in the back of the freezer or on a different shelf to unused frozen produce.
- Used those with the earliest date first
- Make sure the rims of containers are wiped clean with a clean cloth before placing lids into position
- Leave around 2.5cm space around packages
- Leave a 1.5mm head space in containers to accommodate expansion
- If you experience a power failure do not open the freezer door, a full freezer will retain its temperature for around two days. However the less you have in your freezer the quicker it will start to defrost. Do not take any chances with thawed produce it is better to throw out food if you are not sure rather then risk illness through contaminated food.
- Only defrost food before cooking if necessary i.e. most vegetables are cooked from their frozen state. Meat and full meals should be defrosted in the refrigerator.
Basic method for fruit
To freeze fruit you will need to use sugar syrup, ascorbic acid or both. The strength of the syrup is dependent on the type of fruit:
- berry fruit purees = Ascorbic acid only – ½ teaspoon of citric acid per 1.2L of water
- peaches, apricots, nectarines, pears = Medium syrup plus ascorbic acid as above
- plums = medium to heavy syrup plus ascorbic acid
- rhubarb = heavy syrup
- strawberries whole = medium to heavy syrup
- oranges and grapefruit = medium syrup plus ascorbic acid
- pineapple = medium syrup
Note: ascorbic acid is added to prevent darkening of fruit
Light syrup
2 cups of sugar per 1.2L of water
Medium Syrup
3 cups of sugar per 1.2L of water
Heavy syrup
4 ¾ cups of sugar per 1.2L of water
Method:
Boil the water and sugar stirring until dissolved. Cool and place in refrigerator or freezer until ice cold not frozen. Always leave a head space of 1.5mm when packing into containers.
For fruits that require ascorbic or citric acid add ½ teaspoon dissolved in 1 tablespoon of cold water to the cooled sugar syrup
Fruit or vegetables should be frozen on the day they are picked to ensure the least loss of flavour and colour. Most frozen fruit or vegetables will retain their nutrients and flavour, but some will lose their consistency when thawed out. Tomatoes, for example, become mushy, but they can still be used in cooking. Once thawed out, vegetables should not be refrozen.
Vegetables particularly suited to freezing include peas, beans, soybeans, corn and asparagus.
General procedure:
1. Pack food in airtight containers such as plastic freezer bags or plastic containers.
2. Before sealing the container, remove as much air as possible.
3. Write the date of processing on the container. Most frozen vegetables can be kept up to 8 months in a standard home freezer.
4. When you put the container into the refrigerator, place it as close as possible to where the refrigerant circulates. This is the coldest part and is where freezing will be fastest. Leave a small air gap between containers when first freezing. This increases the rate of freezing. You might turn the freezer up to high when first freezing then turn it back later. Avoid too frequent opening of freezer door when a new batch of vegetables is being stored.
Blanching
Some books (particularly older ones) will suggest that vegetables should be blanched before freezing. Blanching is a process of cooking or part cooking. Some people believe it reduces the pungency of certain strong flavoured vegetables (e.g. cabbage or onions) while others believe it is necessary for the freezing process (although others will argue that it most cases it is unnecessary).
How to blanch
1. Put prepared vegetable into 1 to 2 litres of boiling water or steam it for several minutes.
2. Plunge the vegetable into iced water to rapidly cool. These extremes of temperature are said to kill harmful bacteria and keep the vegetable fresh.
3. Allow to dry thoroughly before placing in freezer bags.
Managing the Freezer
You should plan what you freeze. Keep a written record of what you freeze and when you freeze it, so you can see what the oldest food - this should be used first. When you remove something from the freezer, mark it off on your record. Plan how much of each crop you put into the freezer, so you don't end up with too much of one thing and too little of another.
Consider:
- The size of your freezer.
- How much food your family needs.
- The best times to grow particular crops. What time of year will the produce be ready?
- What time of year will there be room in the freezer?
- The time needed to prepare and pack food for freezing.
VEGETABLES YOU CAN FREEZE
Vegetable
Method of Freezing
Asparagus Normally blanched 2 4 minutes, packed alternating stems and tips to minimise air gaps.
Common bean Frozen whole or sliced; may be blanched 3 minutes.
Broad Bean Shelled, washed and often blanched. Small size blanched 2 minutes, large 4 minutes. Drained and cooled before freezing.
Beetroot Boiled 30 50 mins, peeled, packed and frozen.
Broccoli Soak 30 minutes in salt solution to remove any insects, then blanch 3 minutes, cool, drain and pack as air tight as possible (this can be difficult).
Carrots Cut into slices, boil 5 minutes, then pack and freeze.
Corn Remove from plant, trim off leaves, place in freezer bags and freeze, as quickly as possible.
Cauliflower Treat the same as broccoli.
Mushrooms Wash, trim and soak in a solution of 2 cups of water to 1 teaspoon of lemon juice. After 5 minutes, remove and steam for 3 minutes. Cool, pack, seal and freeze.
Okra Use only tender green pods. Remove stems and wash. Boil for 3 minutes, cool and drain. Either freeze whole or slice first then pack for freezing.
Parsnip Treat the same as carrots.
Pea Shell, blanch for 1 to 2 minutes, cool, drain and freeze packed in freezer bags.
Tomato Freeze whole and untreated to be used later to flavour stews make sauces etc if you cannot process quickly. However it is best to cook before freezing. Tomato paste's storage life can be extended considerably by freezing.
Anti-Browning Agents
Some foods tend to discolour if there have not had an anti-browning agent added:
- Pack fruit in white (not brown) sugar or a sugar syrup
- Use non-iodised salt in the water when you rinse or wash your vegetables before processing.
- Use only soft water when blanching vegetables. Hard or brackish water will blacken them.
- Some fruits darken unless you add citric or ascorbic acid i.e. apples, plums, peaches etc. lemon juice may be used as an alternative at the rate of 125ml per 3 litres of water.
How to Soften Water
Hard water causes produce to brown during freezing it also produces scum on top of preserves during the cooking process.
a. Boil the water hard for 20 minutes
b. Allow to cool and stand for 24 hours then
c. Remove scum
d. Using a ladle transfer the water carefully into a clean container making sure that you leave behind any sediment
DRYING FOOD
One of the oldest methods of food preservation is drying. In the self sufficient household drying can be an important way of preserving food. Once you have filled your freezer and your pantry with preserves, bottled fruit and frozen produce and space is limited or the produce does not lend itself to these other methods drying can be an alternative, space saving, inexpensive technique that adds variety to your diet.
Drying involves reducing the water content of a food to a very low level so that fungi and bacteria cannot be supported. This can be done either by natural methods, using the sun, or by using a food drying machine which consists of a heater element and a fan to circulate the heat.
Drying is done on trays or racks often stacked one on top of another, but with sufficient space to allow good air circulation between layers.
Dried products are best stored in airtight containers at room temperature in a dark cupboard or pantry. Fruit or vegetables can be cooked up into a pulp and dried as a puree to form 'leathers', or sliced and dried. Vegetable soups can also be dried. Even meats can be dried. The dried puree may be reconstituted with water at a later stage. This process is commercially used for potatoes, peas and beans, bananas etc.
Drying can in fact be used for virtually any type of vegetable to make your own soup powder (for instant soup), to preserve tomatoes, peppers or anything else to add to stews or casseroles, or to preserve tomato paste for spaghetti sauce, etc.
Drying is also a safe and healthy method. The drying process removes the water content from the food and because of this bacteria and mould cannot grow and contaminate the food. Drying food is simple too, particularly if you are using a small commercially manufactured dehydrator. Alternatively food can also be dried in the sun on mesh racks or in an oven. It is just a matter of combining the correct temperature, low humidity and air flow.
However in areas that experience high temperatures and high humidity solar drying is not an option.
Dried beans, nuts and seeds supply protein and as such are a valuable addition to the diet. Fruit leathers and dried fruit such as bananas and apples are energy foods that are ideal for children as healthy alternatives to high sugar content sweets. Dried vegetables and herbs make quick and delicious soups.
The optimum temperature at which foods should be dried is 60 – 70 degrees Celsius. Food should never be dried at high temperatures as this tends to cook the food. Even it may appear dry on the hard outside surface, inside it will be soft i.e. because the outside layer was sealed the inside retains moisture which leads to growth of mould. Low humidity and air flow helps to speed up the drying process.
Guidelines
- Process food as soon after harvest as possible i.e. blanch, cool and lay out to dry or place in dehydrator as quickly as possible
- Dry food rapidly but do not exceed the recommended drying temperature
- Do not interrupt the drying process
- Do not dry food that has already been partially dried and left for any reason. Mould and other organisms will quickly grow and contaminate partially dried food
- Start the drying process at 65 – 70 degrees Celsius
- Once the outside of the food feels dry lower the temperature to 60 degrees Celsius so that the food does not cook or scorch as this tends to happen towards the end of the drying process when most of the moisture has evaporated.
- Make sure that air moves freely around the ventilator this avoids moisture laden air being trapped around the ventilator thereby stopping the dehydration process.
- Stir the food regularly and move the drying racks in the dryer or oven, try to process even sized pieces so that all the food requires the same amount of drying time.
- Experiment to get the best possible results for your conditions.
LEARN MORE -ENROL NOW
