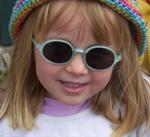
Learn to Take Photos
ACS Student comment: "I found it to be an excellent course in basic Film Photography. The section on exposure was very clear. I appreciate the diagrams and clear concise directions in developing and enlarging film. The staff were very kind and my tutor was very encouraging and always gave clear feedback. I was very happy with the flexibility of the course. I moved to a different country and was able to continue with the course." Emma Day, USA - Introduction to Photography course.
Foundation course for anyone wanting to work in the photographic industry; or study a certificate or diploma in photography
- Work in photography, get a job, start a business, lay a foundation for further study
A comprehensive introduction to still photography relevant to either film or digital photography. To complete the assignments, you need access to camera. (Whilst any camera is satisfactory, an SLR is best. Your tutor can advise on buying a camera if you do not have one).
COURSE STRUCTURE
You will be given instructions throughout this subject guide to do various things ... you may be asked to contact an organisation, you may be given something to read, or some information to research. Various tasks will be given to you to develop your knowledge and abilities in photography care. Along with these tasks, you will also be given a number of questions to answer at the end of each lesson. You are required to submit them as an assignment to your tutor.
1. Origins of Photography:
To discuss the principles those underpins photography and examine the evolution into digital technologies.
2. Film
To explain how photographic images are able to be captured on film or digitally. This lesson will also explain how photographic images are able to be captured by digital cameras.
3. Photo Equipment: Cameras
To provide you with a firm understanding of how you can work at improving your capabilities with respect to taking photographs
4. Photo Equipment
To determine appropriate application for a range of common items of photographic equipment and develop an understanding of how digital images can be transferred effectively from a digital camera
5. Processing/Developing Images
Developing Different Film Types, Processing Solutions, Fixer, Developer, Stop Bath, Fixing, Washing, Wetting Agents, Drying, etc.
6. Enlarging and Photo Manipulation
Describe the process by which photographic film may be enlarged. Also explains techniques that can be used to process digital photographs within a computer to achieve improved or changed images.
7. Lighting
To work more effectively with light when taking photographs.
8. Fault Finding
Common Problems, and how to deal with them.
Duration 100 hours
AIMS
- Discuss the principles those underpins photography and examine the evolution into digital technologies.
- Explain how photographic images are able to be captured on film. This lesson will also explain how photographic images are able to be captured by digital cameras.
- Provide you with a firm understanding of how you can work at improving your capabilities with respect to taking photographs. It provides a framework, upon which you will base your work in future lessons.
- Determine appropriate application for a range of common items of photographic equipment and develop an understanding of how digital images can be transferred effectively from a digital camera
- Explain how photographic film is developed.
- Describe the process by which photographic film may be enlarged. Also explain techniques that can be used to process digital photographs within a computer to achieve improved or changed images.
- Work more effectively with light when taking photographs.
- To identify and avoid common faults in photographs.
Tips for Portrait Photography
There are 3 basic face positions in a head & shoulders portrait:
 Full face to the camera.
This creates a feeling of intimacy and to some degree, formality.- Three quarters view.
Tilting the head down or to the side, creates a more informal or relaxed view.
- Profile
Photographing side on to the camera.
- If you're aim is to capture someone's personality, you must first get to know what their personality is. Observe your model, how they stand, walk, sit, react to other people, their facial expressions, their hand movements, etc.
- If you are photographing an old person who has a very wrinkled face and if those wrinkles are a part of his character & personality, then they should be shown (even emphasised) in the photograph, rather than
hidden.
- Some people find it hard to smile naturally when asked; if this is so they are best photographed without a smile.
- Character can be enhanced by the components you put into a photograph with the person you are shooting:
- Footballer: photograph them holding a football.
- Scientist: photograph them in their lab coat.
- Businessman/woman, perhaps photograph them in their elegant office.
- These may seem clichéd ideas but it is a starting point from which to progress to other, creative scenarios.
- A completely different type of portrait is when the photographer attempts to create an
 interesting picture, using a model, but not giving consideration to his/her character and personality. The total picture comes first rather than the person you are photographing; a person as part of a picture not a picture of a person.
If taking this approach, out of courtesy you should make sure your model knows your intentions.
- Usually in a portrait, the person being photographed should dominate.
- If the picture is basically just of the person, and not the surroundings, then the person should, as much as possible, fill the frame.
- If the surroundings are part of the portrait, then the person should be placed in the best position to complement the surroundings.
- Look through the viewfinder and study all parts of the photo before shooting.
- Learn the relationship between the viewfinder and the lens when using a non reflex camera.
- Learn to help your model relax, or appear relaxed:
by talking, giving reassurance of how things are going even if they are not going well.
by telling jokes
- Don't try to get a smile from someone who finds it difficult. A smile is reflected in the eyes as much as the mouth and even if the mouth smiles, it can look odd if the eyes don't also).
- If the muscles in the face are becoming tense, some facial exercises can relax the muscles and make a natural look easier to get. Eg: Breathe in, blow the cheeks up, then exhale....do this a few times. Licking the lips can also help achieve a more natural look.
- Eyes can loose their lively appearance while the model waits for a photo to be taken...this is difficult to explain but an easy problem to see if the photo didn't work out as you wanted. If a model is beginning to stare or look tired in the eyes, tell them to look away from the camera for a while....or to close the eyes for a while.
- Never try to direct an inexperienced model to take up an uncomfortable or awkward pose.
- For head and shoulders shots, the model is best to sit on a backless stool. A backed chair
 can easily become included in the picture and it does tend to support the person and makes them slouch; best to sit the model on the edge of a seat, which makes them sit upright.
- Faces have two sides and they are different. You need to decide which side will be emphasised. Look for the most photogenic side.
- The effect can be changed considerably, by having the model looking straight into the lens, or looking away from the camera.
- Apart from head & shoulders other portrait possibilities are:
- If shot from low on the ground, the model looks taller.
ENROL and Learn More
 RECOMMENDED BOOKS
Check our range of mail order photography texts (reviewed and selected by our academic staff); available mail order through the ACS Bookshop
click to see our bookshop